
Over the past year, I’ve frequently blogged about Fabric Data Agents. Alongside myself, many other community members have been sharing their experiences and best practices to get the most out of Data Agents. However, there is one topic I rarely see discussed: deployment of Data Agents.
As Data Agents become part of production-grade solutions, deployment and lifecycle management become increasingly important. Building a Data Agent is one thing, but moving it consistently between Development, Test, and Production environments is a completely different challenge.
In this blog, I will share my current best practices around deploying Fabric Data Agents, including what works today, where the limitations are, and the gaps that still exist.
Introducing the topic
Many organizations are currently experimenting with Data Agents in development environments. At that stage, manually configuring an agent is usually acceptable. However, once a Data Agent becomes part of a larger solution, manual deployment quickly becomes problematic.
Consider the following scenarios:
- Multiple environments such as Development, Test, and Production.
- Multiple Data Agents with shared standards and governance requirements.
- Different data sources per environment.
- Environment-specific instructions, endpoints, or source references.
- Auditing and change management requirements.
Although Data Agents meta data is stored in git when the Fabric workspace is git connected, this does not address all topics named above yet. Before discussing deployment strategies, it is important to understand what a Data Agent consists of.
A Data Agent typically contains:
- Agent instructions
- Connected data sources
- Source-specific instructions
- Example queries
- AI notes
- Behavioral settings
Most of this configuration is stored as metadata within the Data Agent definition and therefore also available in git. The challenge starts when these configurations contain references to environment-specific resources. For example the source reference of the Data Agent that points to specific Semantic Models, Lakehouses, Warehouses, Eventhouses, and other Fabric items.
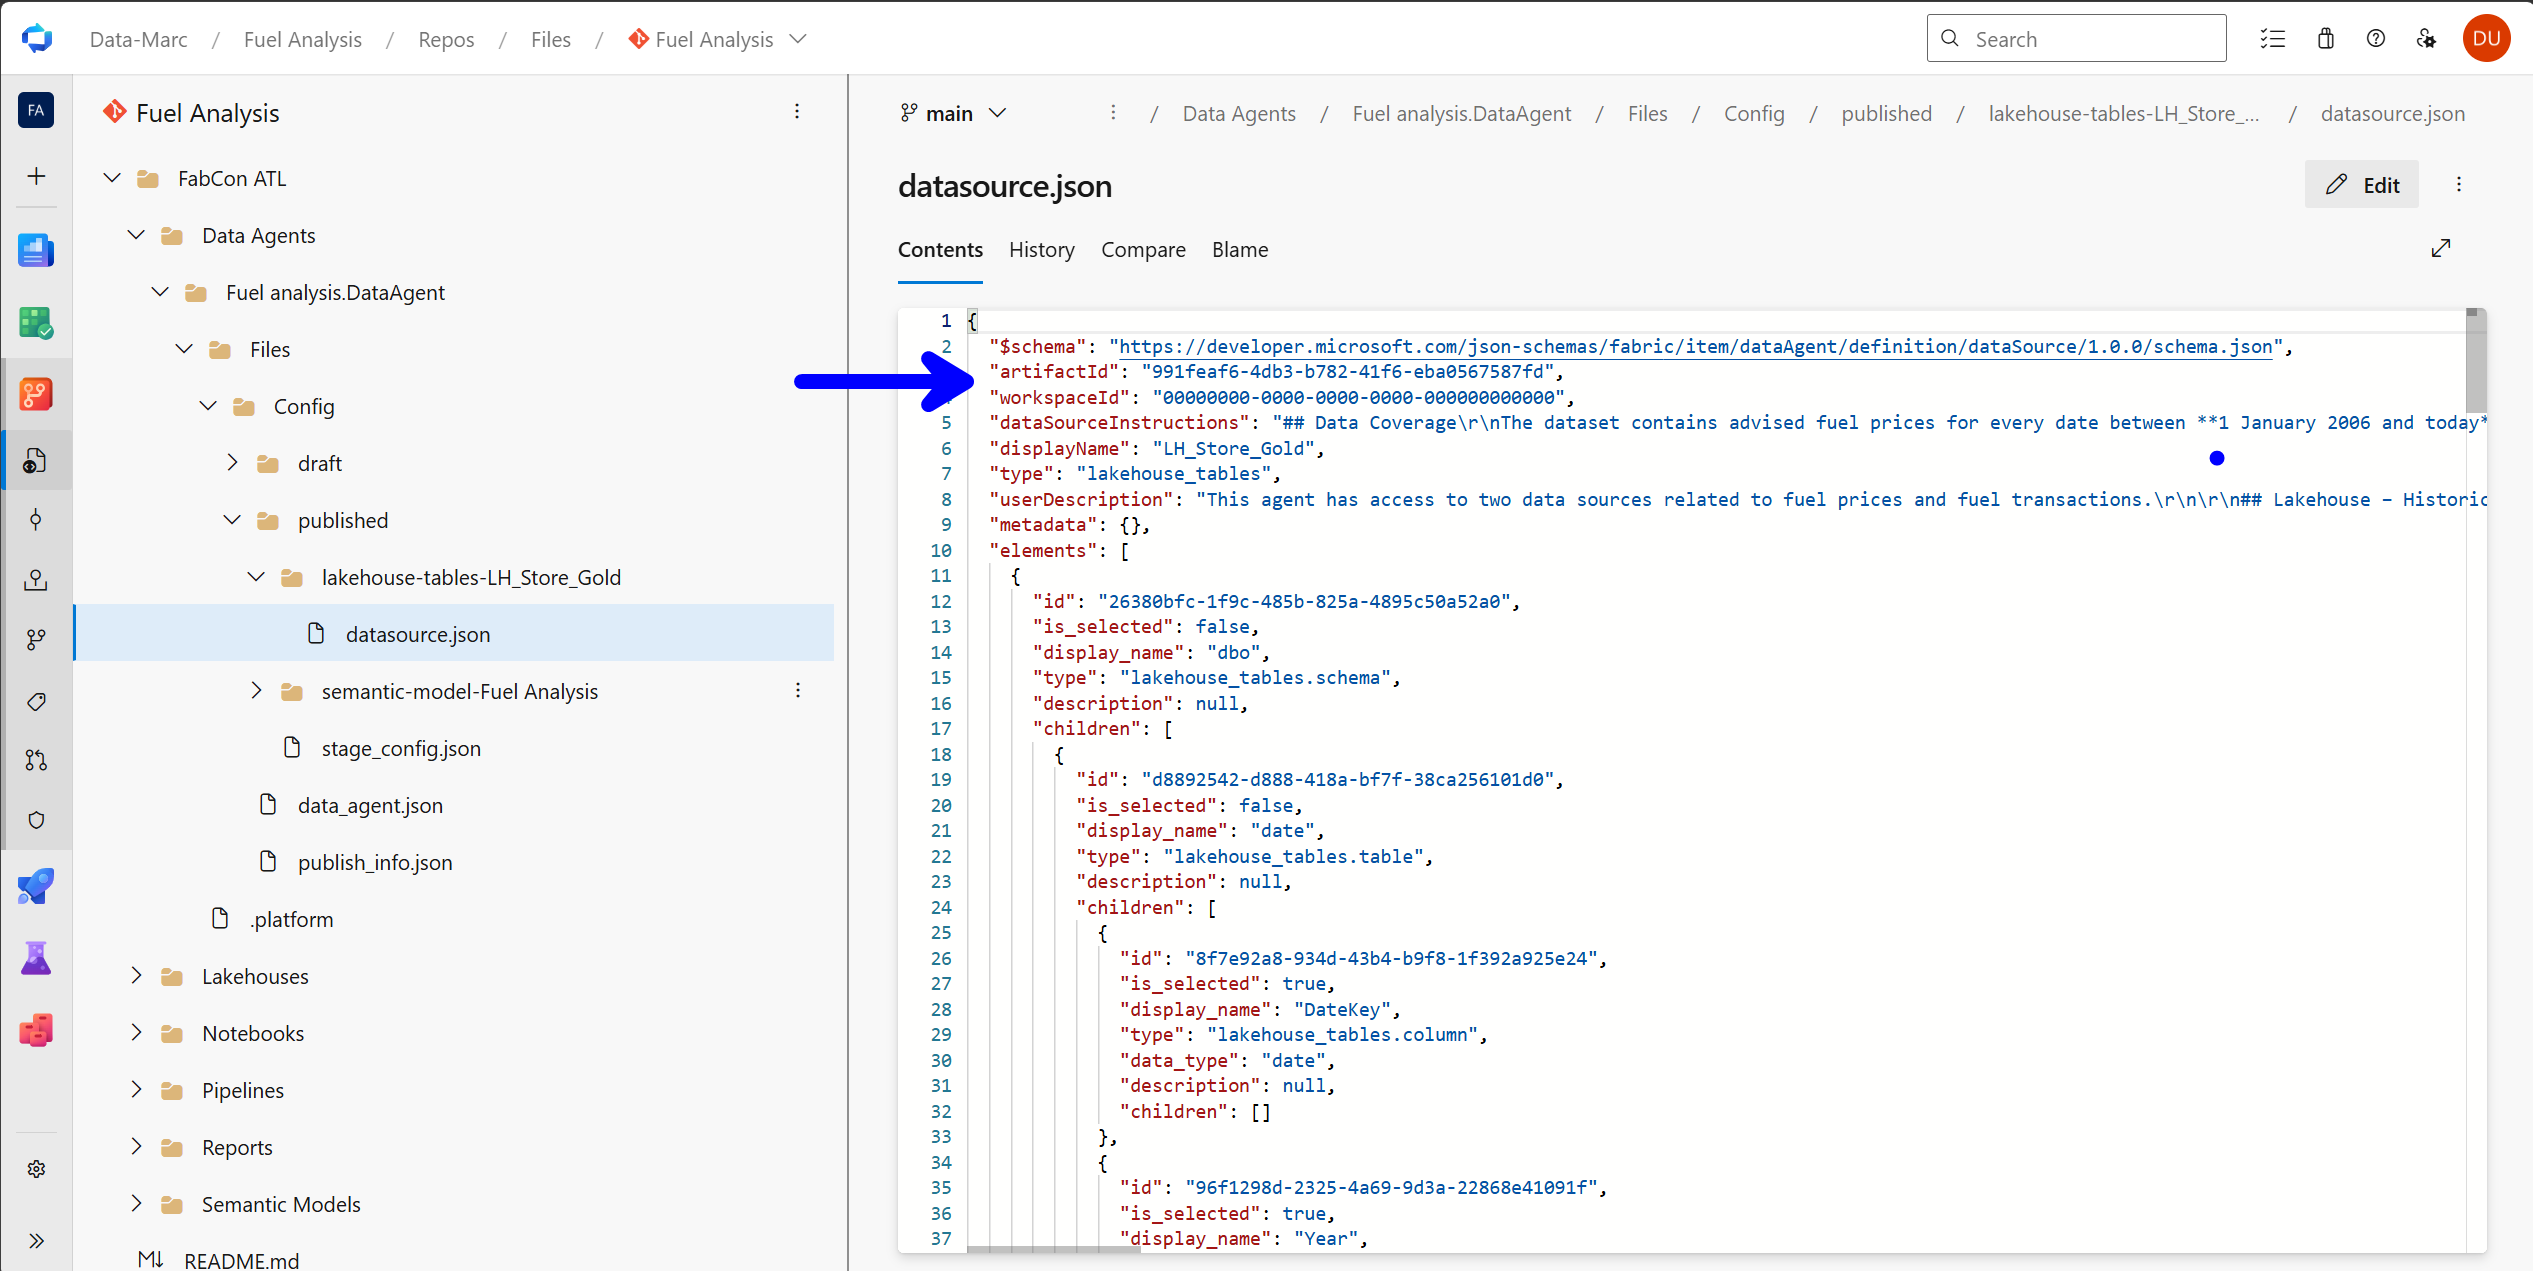
Looking at the metadata in git, we will find the following information:
"$schema": "https://developer.microsoft.com/json-schemas/fabric/item/dataAgent/definition/dataSource/1.0.0/schema.json",
  "artifactId": "991feaf6-4db3-b782-41f6-eba0567587fd",
  "workspaceId": "00000000-0000-0000-0000-000000000000",
  ...
This information contains the artifactId as well as the workspaceId and therefore is pointing to the exact source in an exact location. Although the workspaceId shows all zeros, which means it looks at the current workspace in which the Data Agent is located, the artifactId will point to an exact Fabric item.
The schema reference to, describes exactly what these objects are:
...
  "artifactId": {
        "type": "string",
        "description": "The artifact id of the data source."
      },
      "workspaceId": {
        "type": "string",
        "description": "The workspace id of the data source."
      },
...
Deployment via either Fabric native Deployment Pipelines or any alternative custom deployment pipeline through Azure DevOps or GitHub pipelines will succeed, but the Data Agent will remain pointing to the development data source.
Choosing your deployment strategy
Before discussing the technical implementation, it is worth considering the deployment strategy itself. In my experience, there are currently two approaches that organizations tend to follow when working with Data Agents.
Approach 1: Develop against production data sources
The first approach is surprisingly simple. Instead of maintaining separate source references per environment, the Data Agent is always connected to the production data sources.In this model, Development, Test, and Production workspaces may all contain a copy of the Data Agent, but every copy points to the same production Semantic Models, Lakehouses, Warehouses, or other Fabric items.
The biggest advantage of this approach is simplicity. Since the source references never change, deployment becomes much easier. There is no need to update source identifiers after deployment, and no additional automation is required to reconnect the Data Agent to the correct sources.
However, this approach comes with some important trade-offs. When developing new instructions, modifying source descriptions, or experimenting with agent behavior, you are always working against production data. While the Data Agent itself may not make changes to the underlying data, developers and testers are still interacting directly with production information. Also, adjustment may be done to the Data Agent by adding an additional data source which is not present in production yet. The direct impact is that deployment of your Data Agent must be disconnected from any other platform components.
For some organizations, particularly those with strict governance or data privacy requirements, this may not be acceptable. Additionally, testing becomes less representative of the actual deployment process, since the Data Agent never needs to switch between environments.
Approach 2: Connect each environment to its own sources
The second approach follows the more traditional application lifecycle model. In this setup, the Development Data Agent connects to Development sources, the Test Data Agent connects to Test sources, and the Production Data Agent connects to Production sources.
This provides proper environment isolation and allows developers to safely experiment without affecting production systems or exposing production data unnecessarily. From a governance perspective, this is typically the preferred approach. It aligns with how many organizations already manage Semantic Models, Lakehouses, Warehouses, and other Fabric artifacts across multiple stages.
From a security perspective, this is also the preferred setup. Developers shouldn’t automatically have access to production data just because they are building or testing a Data Agent. Especially in environments with sensitive or regulated data, direct production access during development increases risk of unintended exposure. Even if nothing is modified, simply being able to query or inspect production content through a Data Agent can already be problematic.
Keeping environments separated enforces a clean boundary: developers work with development data, while production access is reserved for controlled, validated deployments. This aligns with least-privilege principles and reduces the chance of accidental data leakage or misuse during development.
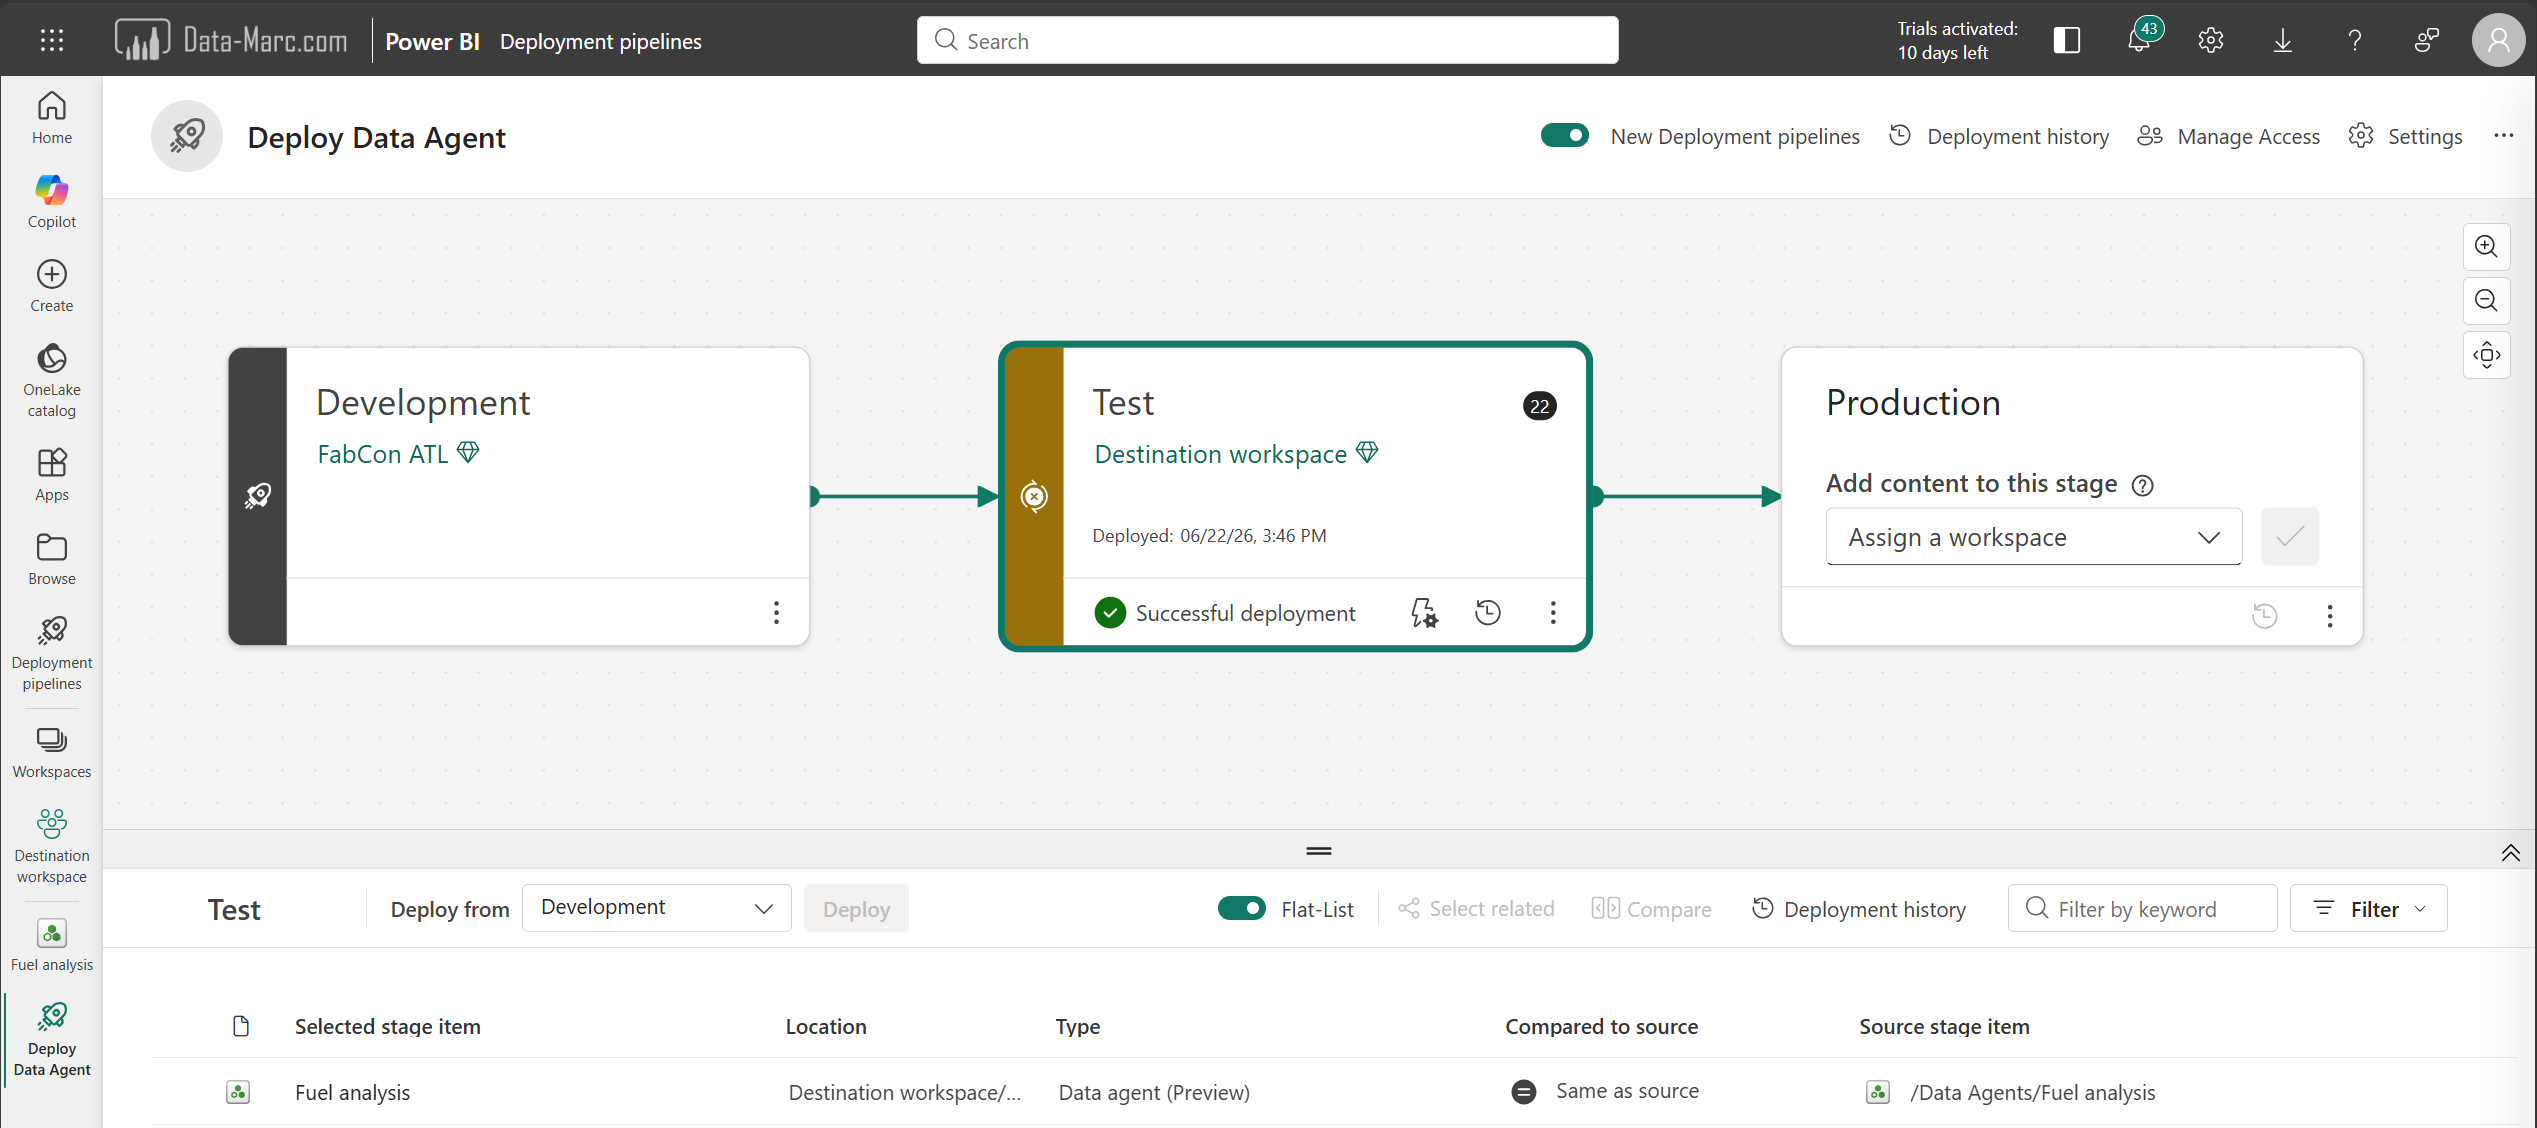
Deployment tool
If you choose approach 1, this is basically where it’s all easy, hit deploy and you’re done. You can simply deploy from development to test and to production without any rebinding of the data sources. Your Data Agent remains connected to the same data sources in source stage as in the target stage of the deployment. In this case, a simple git-based deployment, or using the build-in deployment pipelines will suffice.
However, choosing approach 2, which in my opinion is the best practice, comes with additional deployment challenges. Because every environment contains different Fabric item identifiers, the Data Agent source references need to be updated whenever the Data Agent is promoted to a new stage. This introduces additional deployment logic and automation. In other words, the deployment process becomes more complicated, but the overall solution is usually more robust and better aligned with enterprise development practices.
More and more Fabric items can connect to the Fabric Variable Library. A Variable Library is a centralized place where environment-specific values (like workspace IDs, endpoints, or configuration settings) are stored and managed. It could help to keep your Data Agent deployments consistent across Dev, Test, and Prod without hardcoding values, making CI/CD much easier and less error-prone. However, Variable Libraries are not supported for Data Agents at the time of writing this blog. So, what alternatives do we have?
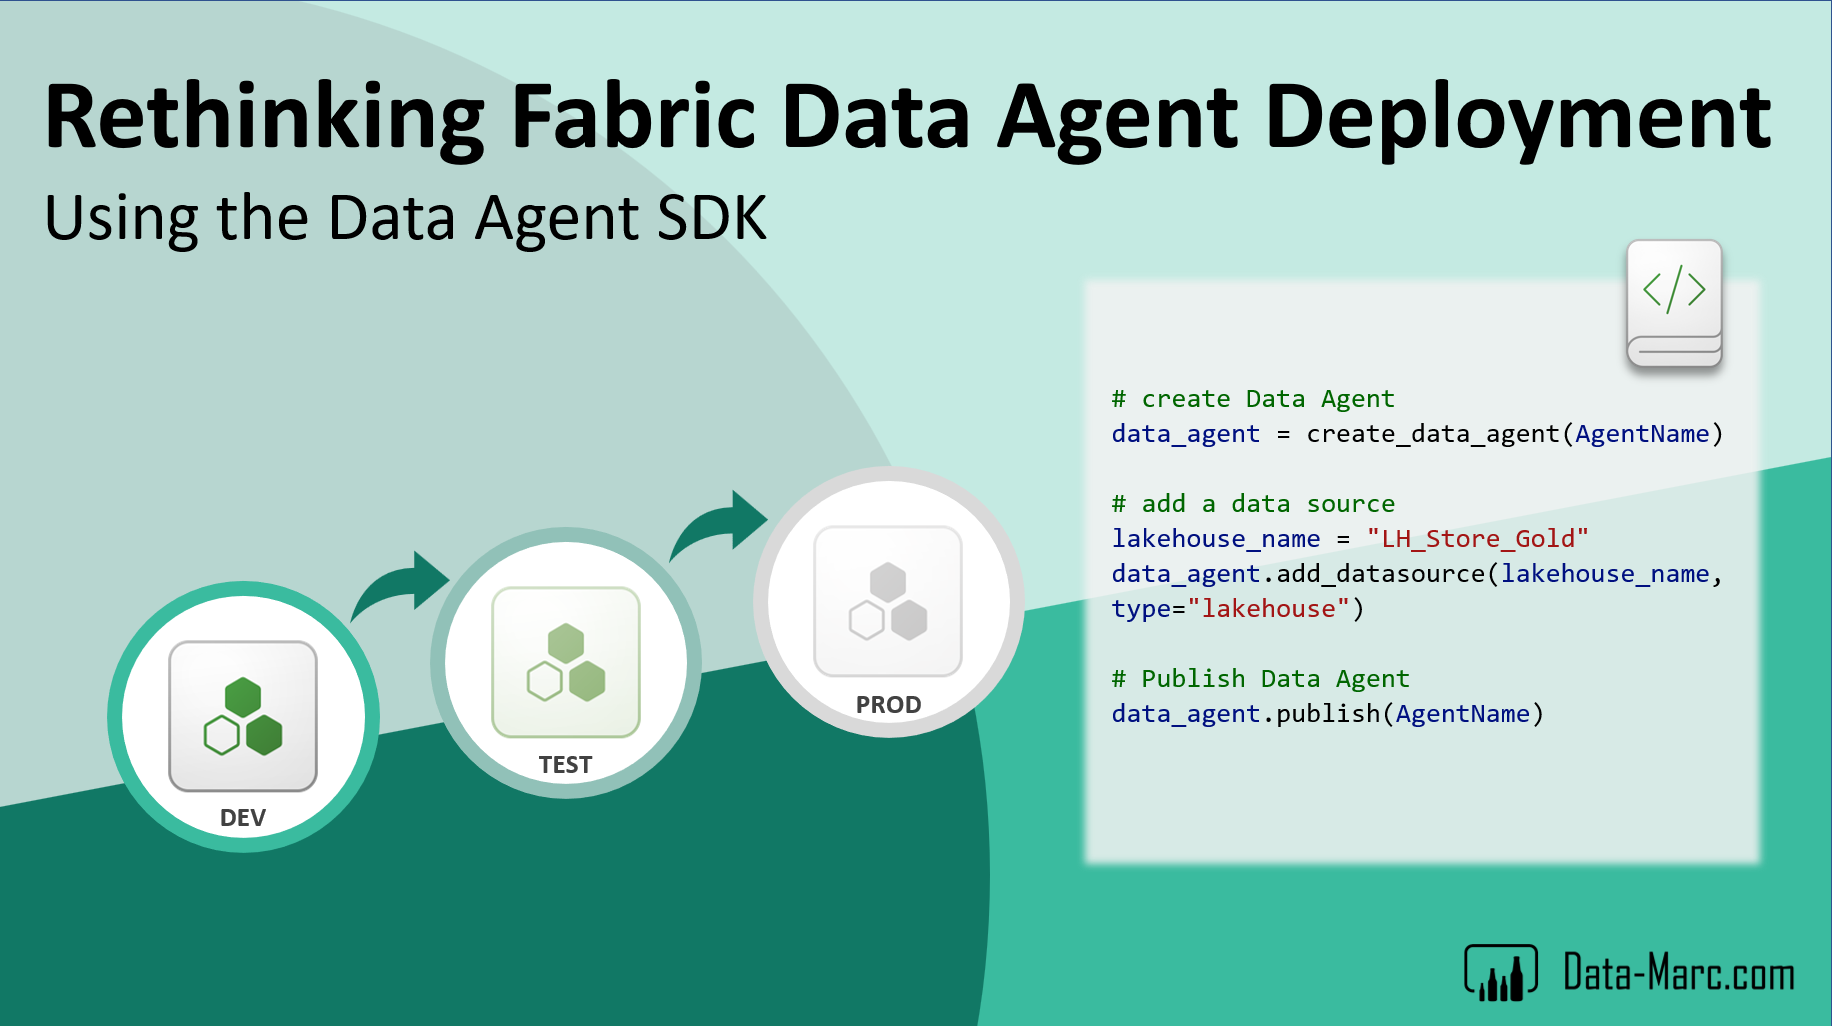
Fabric Data Agent SDK
Data Agents also have a Python Software Development Kit (SDK) which can run from a Fabric Notebook for example. The Fabric Data Agent SDK provides a Python-based way to create, manage, and publish Data Agents programmatically. Instead of configuring everything through the user interface, the SDK allows developers to define Data Agents as code, making it easier to automate deployment, version control changes, and integrate Data Agents into broader CI/CD processes.
You may wonder, how does this relate to application lifecycle management? Well, the Fabric Data Agent SDK enables a slightly different approach to application lifecycle management. Instead of deploying a Data Agent between environments, you can deploy the code that creates the Data Agent.
In this setup, a Notebook contains the complete definition of the Data Agent, including instructions, connected sources, and other configurations. During deployment, the Notebook is deployed to the target environment and executed there, generating a new Data Agent that is automatically configured for that specific stage.
The advantage of this approach is that environment-specific settings can be incorporated directly into the generation process. Rather than deploying a Data Agent and reconfiguring it afterwards, the Data Agent is created with the correct configuration from the start. This aligns well with infrastructure-as-code principles and provides a highly repeatable deployment process across Development, Test, and Production environments.
Example
In the following example, I will use the SDK in a Fabric Notebook to explain how I used it to deploy Data Agents from stage to stage and automatically binding the right data sources in the destination stage.
As a first step, we have to load the SDK in our Fabric Notebook.
# Install Data Agent SDK
%pip install -U fabric-data-agent-sdk --q

from fabric.dataagent.client import (
    FabricDataAgentManagement,
    create_data_agent,
)
The SDK allows us to create fully new Data Agents from scratch and that’s example what we will do, next to binding data sources to a Data Agent based on the name or ID of the item.
# Data Agent specifications
AgentName = "DA_TestAutomationRun"

# create DataAgent
data_agent = create_data_agent(AgentName)
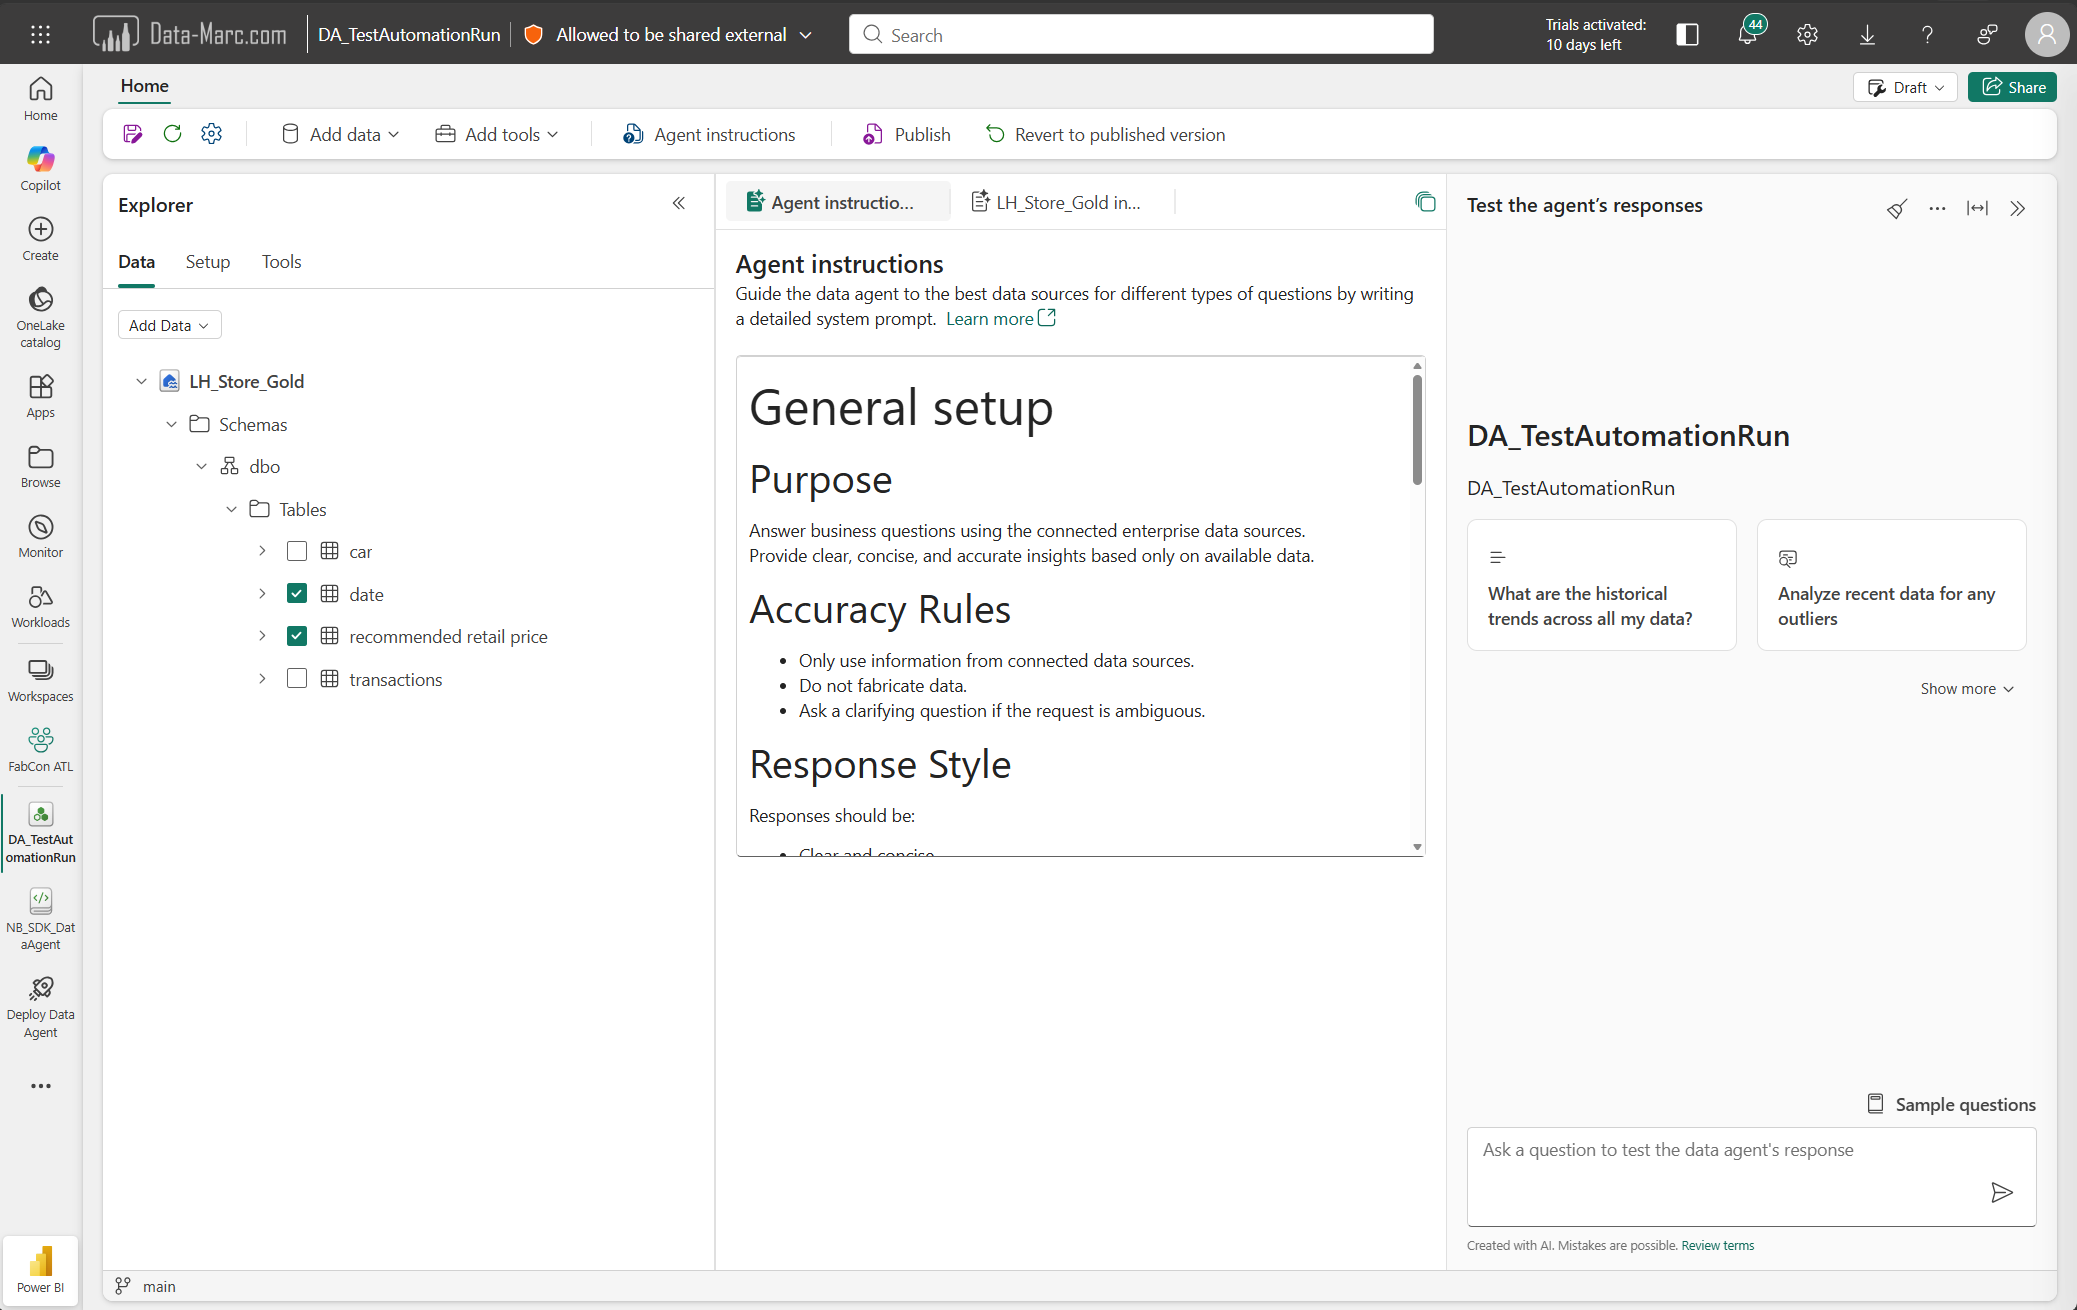
Once the Data Agent is created, we can add Agent Instructions to the Data Agent programmatically as well. These instructions are defined in Markdown language, therefore the quotes and escape characters in below code block. Also, the exact instructions are removed from below section to keep it readable.
# Specify the Data Agent instructions, below instructions are in markdown language
data_agent.update_configuration(
    instructions="""
# General setup
## Purpose
...

## Accuracy Rules
...

## Response Style
Responses should be:
...

## Planning Approach
When answering a question:
...


"""
)

config = data_agent.get_configuration()
print(config)
# Note that the output is one long text string, however in the Data Agent config it is correctly formatted.
Once the Data Agent is created and the instructions are added, the next step is to add data sources. In below example I’m adding a Lakehouse as data source. Note that I’m only specifying the Lakehouse name in this case. Because I do not specify the Workspace in which the Lakehouse is located, it will automatically pick the same Workspace as where the newly created Data Agent is located and the Notebook with SDK is running.
# add a data source
lakehouse_name = "LH_Store_Gold"
data_agent.add_datasource(lakehouse_name, type="lakehouse")

# datasource type could be: lakehouse, kqldatabase, warehouse or semanticmodel
Adding the data source only is not enough as the tables to be used still have to be selected. This can be done using the next code snippet which will first return all available tables and columns in the specified data source.
# Verify added data source(s) and selected table configs
datasource = data_agent.get_datasources()[0] # only returns the first data source, customize where needed
datasource.pretty_print()
Selecting the tables in the data source can be done using the following command. Important to understand is that in this example I’m using a schema-enabled Lakehouse which makes the exact selection command slightly different then when a non-schema-enabled Lakehouse is used. Make sure the path defined matches exactly the path as displayed as output from the previous step.
# Add tables to data agent
datasource.select("Schemas", "dbo", "Tables", "date")
datasource.select("Schemas", "dbo", "Tables", "recommended retail price")

# Note that the order in above select statement should be an exact match with the pattern that was returned in the previous step
After we made a table selection, the next step will be to add data source instructions. Note that this step is not applicable for Semantic Models, as that will be handled differently as described in this blog.
# Update data source instructions
ds_notes = """
## Lakehouse – Historical Advised Fuel Prices
The lakehouse contains a **complete historical dataset of advised retail fuel prices**.

Characteristics:
- Covers **all dates from 1 January 2006 until today**.
- Updated **weekly**.
- Contains the advised price for three fuel types.

Available columns:
- Date
- BenzineEuro95
- Diesel
- LPG

Typical use cases:
- Analyzing fuel price trends over time.
- Determining price increases or decreases between two dates.
- Retrieving advised prices for dates without transactions.
"""
datasource.update_configuration(instructions=ds_notes)
datasource.get_configuration()["additional_instructions"]
Finally, after all the configuration of the Data Agent is done, we only need to publish the Data Agent. Also publishing of the Data Agent can be done programmatically via the SDK. This final code snippet publishes the Data Agent.
data_agent.publish(AgentName)
# Note that it can take a little moment before the published version is available
After these steps, you will get a fully ready Data Agent containing all the components you’re looking for! Above code snippets are solely intended as example and are probably not perfect code. However, they will help you to get started building out your Data Agent deployment.
For your reference, I’ve also uploaded my Notebook as example to my GitHub.
What’s still missing
While the Fabric Data Agent SDK provides a great start for implementing CI/CD and application lifecycle management, I did identify two gaps that currently prevent a fully automated deployment process.
Data Agent sharing
The first gap is around sharing. Once a Data Agent has been created, it still needs to be shared with its intended users if you just want to share the Data Agent only. At the time of writing, I have not found a way to perform this action programmatically.
The Fabric Data Agent SDK does not expose functionality for managing permissions, and I was also unable to find a Fabric REST API that supports item sharing for Data Agents. Therefore, sharing the Data Agent remains a manual step after the Notebook has run that created the Data Agent.
However, if your intend is to share multiple items like Data Agents, Reports and what not that lives in the same Workspace, granting Workspace Viewer permissions might be your way out here. This step can be done programmatically where either individual user access or security group access can be granted on the Workspace itself.
Post deployment execution of the Notebook
The second gap is related to the Notebook-based deployment approach itself. Deploying the Notebook to the target environment is only half of the solution. The Notebook still needs to be executed to generate the Data Agent. Of course, you can just schedule the Notebook and with the next run it will create the Data Agent but that won’t let you validate your end-to-end deployment as after deployment the Data Agent is still missing.
Using Azure DevOps Pipelines or GitHub Actions, this can be solved by adding an additional deployment step that calls the Fabric API to execute the Notebook after deployment. While this works, it requires custom automation outside of Fabric.
If you’re using native Fabric Deployment Pipelines, this becomes more challenging. Deployment Pipelines currently do not offer a post-deployment automation capability, making it impossible to automatically execute the Notebook once it has been deployed to the next stage. Manually triggering or scheduling the Notebook is your only option at this moment in time.
Personally, I don’t see either of these limitations as a blocker, but they do mean that a fully end-to-end, hands-off deployment is not yet available out of the box. In practice, you will need to rely on custom automation to bridge these gaps and complete the lifecycle in a fully controlled CI/CD setup.
Wrap up
Data Agents are more often moving into production scenarios, but the deployment and lifecycle story is not fully there yet. Once you go beyond a simple prototype, you quickly run into questions around environments, governance, and automation.
In this blog, we looked at why deploying Data Agents is not as straightforward as deploying other Fabric items. The main reason is the way source bindings work and how they are tied to specific Fabric item identifiers, which makes deployments less predictable than you would expect.
We also looked at the different ways to handle this today. From a simple setup where everything points to production data, to a more controlled approach where every environment has its own isolated sources. That second option is, in my opinion, the better long-term approach, even though it’s more code heavy!
Deployment itself can be done using the build-in Deployment Pipelines, custom CI/CD with DevOps or GitHub. For Data Agent specifically, we deep dived in the Fabric Data Agent SDK, where you are no longer just deploying a Data Agent, but the logic that generates it per environment. A better fit with infrastructure-as-code principles.
Though, there are still a couple of gaps today, especially around programmatic sharing and fully automated post-deployment execution of Notebooks. I would say, all of this is workable today, but not fully seamless yet. You can build a solid and repeatable setup, but it still requires some effort to get to a fully automated end-to-end deployment.

