
Have you ever found yourself stuck with a modified Power BI Semantic Models, thanks to those well-intentioned but troublesome changes you made through the XMLA endpoint? Does that sound familiar to you? What seemed like a convenient solution quickly turned into a frustrating challenge when you encountered the error message in the Power BI Service.
You wanted to seamlessly continue your development journey in Power BI Desktop, avoiding the need for a full data refresh or just quickly making that one small change, but now hitting a roadblock when trying to download PBIX file. The error message declared that your data model had been modified with the XMLA endpoint. But now, with Git integration you can overcome this challenge!
Well, not any longer! In this blog, I will take you through a detailed, step-by-step guide to reclaim your XMLA-modified Power BI Semantic Model to continue your developments in Power BI Desktop.

The challenge
It might have happened to you, you thought it would be easier to quickly change that one measure definition, relationship or anything else over the XMLA endpoint that comes with your Semantic Model if the workspace resides in a Premium capacity or backed by a Premium-per-User license. It looked like a good idea at first, until you encountered that one annoying error message in the Power BI Service.

You wanted to continue your development in Power BI Desktop. Because you wanted to work with the most recent data and didn’t want to run a full refresh in Power BI Desktop, your idea was to download the latest version of the Semantic Model from the Power BI Service directly. However, when you clicked the button to download the file, you encountered the error stating that you can no longer download the pbix file, since the data model has been modified with the XMLA endpoint.
Also see this documentation with a full list of limitations about downloading pbix files.
Luckily, since not too long ago, you can at least download the report with a live connection to the Semantic Model to continue your development efforts on the report in Power BI Desktop. However, you’re bound to tools like Tabular Editor (2/3), Management Studio or any other tool of your preference for the future, are you?
Let’s not dive in all reasons why you should have prevented this from happening in the first place. Cause you probably should have kept a copy of the solution in a file versioning system like Git. But SharePoint and OneDrive work as well if you’re less tech savvy and Git still scares you a bit. That the solution to this challenge might be in that area though.
What now?
As I already spoiled a bit, the solution to recover your file will be using Git. But before we get started recovering your Semantic Model, let’s make sure you know what elements will be used. If you’ve never used the Git integration before, I recommend reading the documentation that gives you an introduction to Git integration. Another valuable resource that helps to understand the following steps, is to be familiar with Power BI Desktop projects and related file structure which breaks up your Power BI solution in multiple folders and files.
Below I describe in more detail which steps to take to recover your file.
Step 1:
Make sure you link a Git repository to your workspace. You can follow the steps described in this documentation to get it up and running.
Step 2:
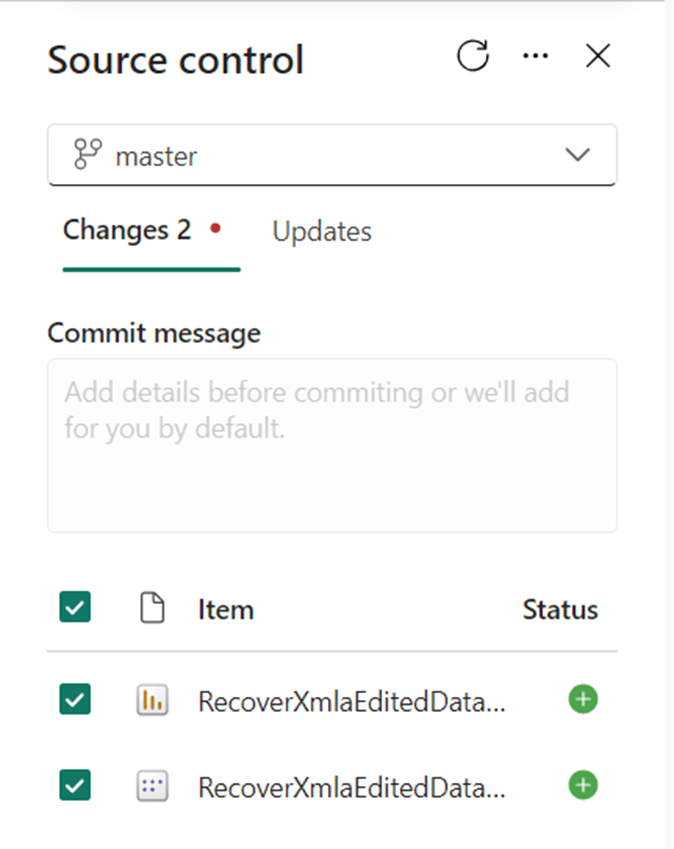
As soon as the repository is connected, you will see in the top ribbon of your workspace a button “Source Control” showing you there are changes in your workspace which are not committed to Git yet. Click this button to show all changes. Typically, all Semantic Models and reports will show up in the Source Control pane on the right.
Step 3:
When you have the Source Control pane open, you can select the Semantic Models (and reports) you want to commit to Git. In my example I only have one Semantic Model and one report. I choose to commit both to Git.
Step 4:
Now we have the Semantic Model and report in Git, let’s have a closer look at the files in the repository. There are two folders, one for the Semantic Model and one for the report.

Each folder contains the meta data files for either the Semantic Model or report. But based on only the meta data, we cannot do much yet. It is in Git now, but not yet in Desktop.
Step 5:
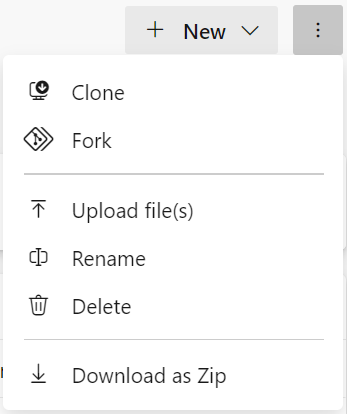
Since we want to have the solution back in Power BI Desktop, we have to clone the repository to our local machine. To clone the repository, you can use Visual Studio Code, Git Gui, command line tools or any tool of your preference. If you’re not familiar with this concept, have a look at this documentation that explains how to clone a repository.
If all this is too complex for you, you can also consider downloading a copy of the repository as zip file. In this way, you still get a local copy of all the meta data on your computer.
Step 6:
After we cloned or downloaded the meta data from our solution to our local machine, we can browse through all the files. If you’ve looked at the documentation about the Power BI Project Files before, you might notice that one file is missing. The PBIP file, which binds it all together and includes pointers to the files is missing. The schema for these PBIP files is publicly available on GitHub and this helps us to understand what is specified in the file. We have to manually create a file like this, to make sure we can open the solution again in Power BI Desktop.
Step 7:
Open any text or code editor of your choice and use the following sample json.
{
  "version": "1.0",
  "artifacts": [
    {
      "report": {
        "path": "RecoverXmlaEditedDataset.Report"
      }
    }
  ],
  "settings": {
    "enableAutoRecovery": true
  }
}
Make sure you update the above schema, so the name of your solution is displayed in the path. In my case it is RecoverXmlaEditedDataset. The “.Report” at the end refers to the folder where the report meta data is saved. This must be there, as that is the bases for Power BI Desktop to open the file later on.
Step 8:
Once you created a file, save it in the same folder as where the project is saved. The name of the again should represent the name of your solution.
Step 9:
If you created it as a text file, the extension is most likely .txt. The extension of your file also must be updated to .pbip. Windows might throw an error warning you that the file might become unusable.

Step 9:
If all went well, you would see a Power BI icon for the PBIP file. If you double click this file, it will open Power BI Desktop without any problem! There is only one thing missing, which is the data. Power BI Desktop will also show you a warning on top that “Some tables have incomplete or no data”. Power BI Project Files setup, the data is not committed to the repository by default. Gitignore files in Power BI Project File setup include the following line: **/.pbi/cache.abf which excludes all data.

To resolve the lack of data, we simply click the refresh button. Potentially you will be prompted to sign-in to the data source if the credentials to this source are not in your local cache yet.
Wrap-up
By completing above steps successfully, you should be good to go to continue your developments in Power BI desktop and all meta data changes made with the XMLA endpoint should be visible. After you made your changes in desktop, you can obviously hit the publish button again in Power BI Desktop, or directly benefit from the Git integration you setup and professionalize your deployment process taking full benefit of Git.
Last, for the case I tested, I created various measures, an Object Level Security role and a Calculation group. All showed up as expected in Power BI Desktop.

Potentially, you made other changes to the data model which might not work. As far as I could find, there is no documentation from Microsoft that describes this way of working is supported. Therefore, I want to warn you about this way of working. It might not always succeed and therefore it on your own risk.

Pingback: Pulling XMLA-Modified Power BI Datasets into Source Control – Curated SQL
Thanks Marc, I have used this today to get a copy of PBIX files connected in Live mode to enable me to find all the measures!
LikeLiked by 2 people
Hi Marc,
Great article! I am evaluating Fabric Workspaces now and I like “edit model” possibility from workspace. What brought me to this page is scenario where someone could use XMLA write operation against semantic model and disable edit from workspace possibility.
Do you think there is a way to recover Fabric semantic model so it is again editable from workspace?
LikeLike