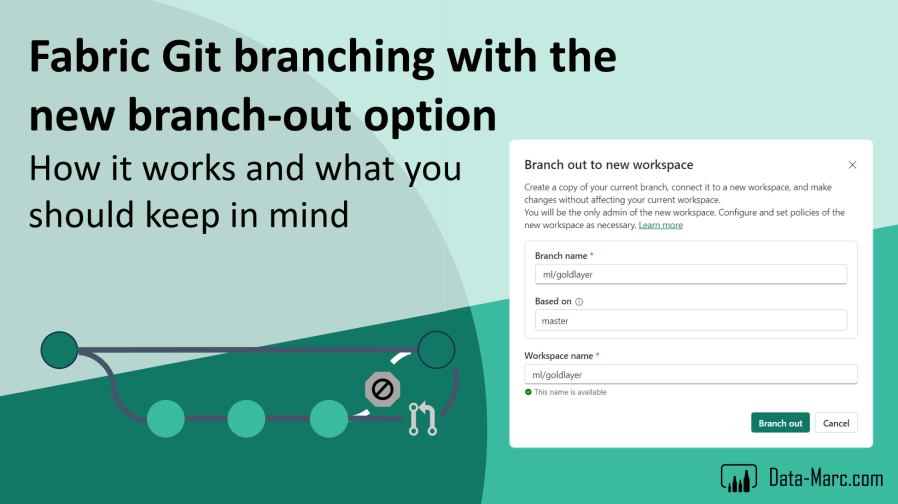
Yesterday, Microsoft released a new option called “branch-out” that allows you to easily setup a new branch from an existing Fabric workspace. Obviously, this was already possible but involved a lot of manual work. With this new option, you can create your own feature branch to work in isolation before you commit your work to the central repository.
In this blog, I will deep dive more in this branch-out feature, how it works, including some things to keep in mind working with this feature.

Setting the basics
All I’m describing in this blog is related to the Continuous Integration and Continuous Delivery (CI/CD) story of Fabric. Git integration on your Fabric workspace is an essential part of this story and has been around since the release of Fabric. Git as a central location for your source code, helps you to easily reproduce, deploy and develop your solution with features like version control, collaboration, tracking changes and being able to compare versions.
Typically, you will not work directly in a production workspace. Therefore, you setup multiple workspaces like Development, Test and Production (DTAP). You could start using tools like Deployment Pipelines to move items from one workspace to another through your DT(A)P setup. However, collaboration is not easy in this case, as you don’t want to work with multiple developers in the same notebook, semantic model or lakehouse at the same time.
Therefore, branches are an essential part of this story. Each developer working on the solution, will create a feature branch first, in which they work in isolation. Essentially, a feature branch is a copy of the code to an isolated environment. In this feature branch the work of that specific developer can be added to the source code. Once that developer finished the work item, you can start raising a pull request (PR). This pull request, is basically a request to merge your changes from your feature branch with the main source code. Typically, you’re not allowed to approve your own pull requests, but this has to be done by one of your co-workers.
Below a visual example in which a developer creates a feature branch, after which multiple changes (commits) are done in a feature branch. Finally, a pull request is opened to merge the changes back to the main branch.

Branching in Fabric
Branching is not new and was already possible with the Git integration in Fabric. Setting up a new workspace and connecting it to the Git repository was the way to go. After that, you had to pull all code from the Git repository into your workspace before you could start working. However, that was a cumbersome setup. You had to manually create a new workspace (if your tenant admin allows you to), after which you had to configure the Git integration by hand.
Now, with the most recent update in Fabric, you can easily branch out to a new workspace in a few clicks. You will have two options, either start a new branch in the current workspace, or the all new option to branch out to a new workspace. Personally, I’m a fan of the latter one. This option appears in the source control menu of the workspace.

Also, you will be able to spot related workspaces where other feature branches might already be created. In my example above, there are no related workspaces though.
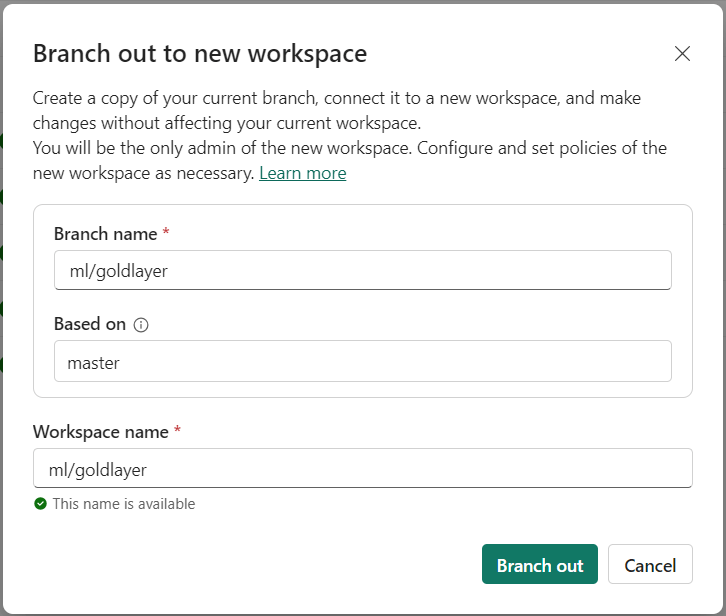
Once you branch out, you can easily define your branch name. In here, make sure you name your branch to something logical that also includes your initials or name, so your colleagues can relate to whom a feature branch belongs. Align these best practices within your team and organization. The section that defines based on which branch you branch out, is a read-only field and is always the same as the workspace you branch out from. In my example below, I’m branching out from the master branch, but you can also branch out based on other existing (feature-) branches, if that is configured in your workspace. As a final step define the workspace name, and you’re good to go! Personally, I fill the same name as workspace name, as I did for the branch name.
What is important to understand, is what is happening under the covers. A few essential steps are happening (listed in no specific order):
- Create a new workspace
- Create new feature branch in git
- Link git repository to workspace based on new branch
- Pull all source code from git into the workspace (this can take a little moment)
A few things to keep in mind:
- The permissions from the original workspace are not taken into account for the new workspace
- If you organized your Fabric items in folders, this is not represented in git and therefore not in your feature branch workspace
What was not mentioned by Microsoft
The few things listed above are not the only things to keep in mind. Cause there are a few important things with regards to the governance of your Fabric tenant that can lead to a mess, if you don’t govern it well.
Not allowed to create workspaces
The workspace that is being created when you branch out, can only be created when you have workspace creation permissions. In case your tenant administrator does not allow you to do so, I’m afraid you need to have a good talk with them. Cause in that situation, they are blocking a professional way of working with feature branches and the new branch out feature.
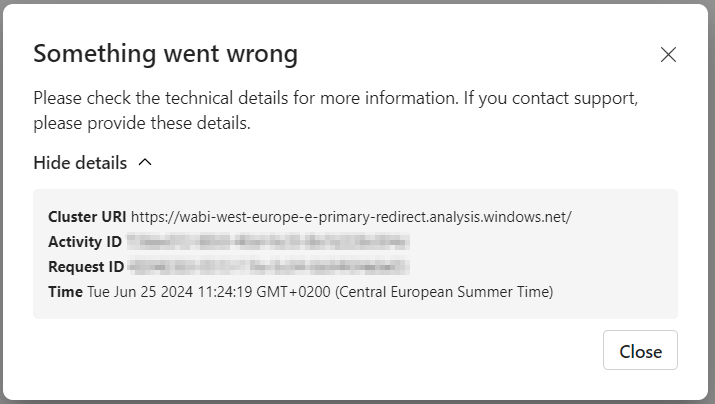
All jokes aside, if you try to branch out, but you don’t have workspace creation permissions, you will get a very unsatisfying error message that does not clearly tell you what is going on.
Workspace remains after pull request is approved
Let’s assume you won the battle with your tenant administrator, you succeeded having an isolated workspace in which you completed your work items and now you created a pull request. In Azure DevOps, your colleague wants to complete your pull request and as part of that, you can automatically delete the feature branch that I created earlier (ml/goldlayer in this example).

Deleting the branch is very common if not best practice. For each item you will work on, you create a new feature branch. To keep your Git repository tidy, you just want to get rid of old feature branches so you want to delete them automatically after approving the pull request.
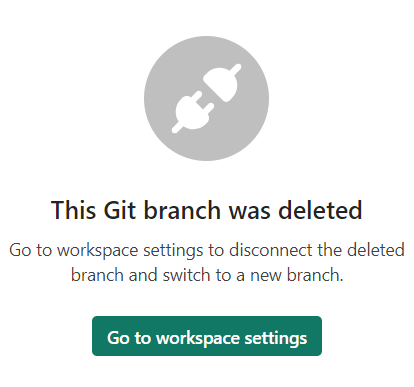
However, the workspace in which the feature branch was connected, will not be cleaned up automatically. The workspace remains to exist and the source control tab shows the Git branch was deleted.
Why is this such a big deal? Well… your tenant admin that first wanted to keep a grip on workspace creation may have been right. Cause by creating new feature branches for every work item, you end up with many workspaces in Fabric which will get messy pretty quickly.
Is this a killer for using the branch out option? Well, I don’t think so… you can overcome this by automating setting up a build pipelines in Fabric that automatically triggers after completing a pull request. In case you agree that the feature branch has the same name as the workspace, it is easy to identify the workspace in Fabric and you could automate the delete action of the workspace.
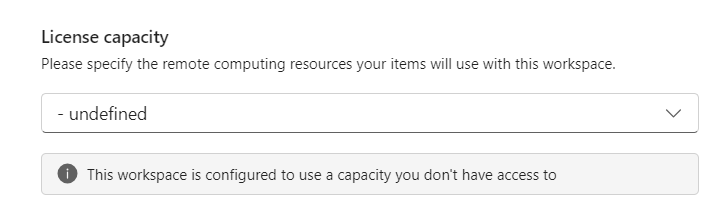
Which Fabric capacity is used for your feature branch?
The newly created workspace while branching out, will automatically be assigned to a Fabric capacity upon creation. If you open workspace settings, you will see that the workspace is assigned to a capacity you don’t have access to.
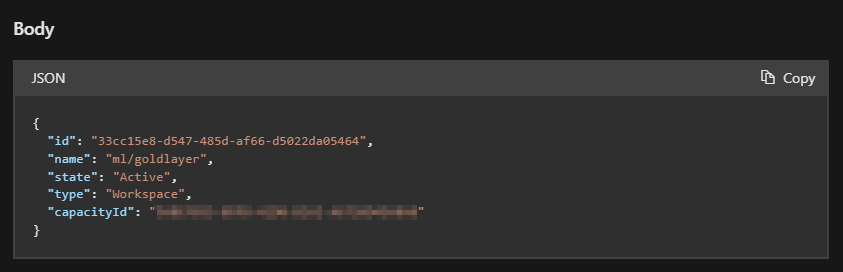
However, with the Fabric REST API, you can get all workspace details. That shows us the assigned capacity id, which is the same capacity as the original workspace. Also, if you go into your Fabric admin portal as a capacity administrator, you will find the newly created workspace as being assigned to your capacity in the overview.
Coming back to the previous point around workspaces that stick to Fabric, even when the feature branch is deleted, this will not only make a mess of all the workspaces you have, but also all the workspaces assigned to your capacity. So, I would see the capacity assignment as another argument to automate deletion of the workspaces after approved pull requests.
Wrap up
All by all, I may have sounded a bit negative about this feature. But nothing of that is true. I’m super happy and all excited with the ease you can branch out to new workspaces now! It helps for sure to automate your development process in Fabric.
I do think though, that there are a few gotcha’s in there that will have an effect on your platform governance. But just to keep in mind and all can be overcome. For example, given the branched-out workspaces are automatically assigned to the same capacity, you must be sure from which workspace you branch out. In case you branch out from your production workspace, your new workspace will also be on the production capacity. Then, being an overzealous developer, you’re testing your code on big data volumes, and you may take down the production capacity. To prevent this from happening, you setup a development capacity, but that was not used while branching out.
All by all, I think you can easily automate a “clean up” step in DevOps that triggers after approval of a pull request automatically. Just delete the workspace.
So, you have to make sure that you branch out from another development workspace and clean up your mess after the works is done. But well, that is related to the end-to-end branching strategy, workspace setup, branches connected and what more. I feel there is another blog post upcoming 😉.

Pingback: Suggested architecture for collaborative Power BI / Fabric development w. GIT Integration – Downhill Data
Really good article – looking forward to the follow up (hopefully) with a take on automatic workspace deletion
LikeLike
Pingback: Branch-Out in Microsoft Fabric – Curated SQL
Pingback: Fabric CI/CD with Git deployment and release strategies – Data – Marc
what if the branch out to new workspace is greyed out? do we need any permissions or settings to be enabled?
LikeLike
Haven’t seen that before. I recommend raising a support ticket to Microsoft. You may be running into a limitation, or maybe it’s caused by a branch policy on the git side?
—Marc
LikeLike
Thanks Marc for this article.
I have two questions:
1- Does Branching out to an existing workspace, allow the user to avoid needing to contact tenant admins to create a workspace. What makes you prefer the second option over the first option, i.e. what is its limitation
Question 2: From an fabric admin, imagine that you have workspaces that you are segregating based on teams (sometimes a team may have multiple workspaces as well). how would you structure you devops items to align with your workspace.
Would you create a project for the team, and place the different workspaces in separate repo’s where the dev/test/prod of that workspace would have different branches? of would you create a project for the whole organization (call it for example Fabric), and segregate teams at the repo levels with workspaces at the level of branches?
Thanks
LikeLike
HI Moe,
Apologies for the delay in my reply.
For one, there is a limitation on workspace creator permissions – which is a good thing in my opinion.
For the second one, I think it is not about teams, or departments, but rather about data products. Centralize your workspace structure around data products which logically belong to a domain. These domains can be departments of course. For each data product, I would setup a new DevOps project to keep everything clean – also permission wise. Each data product should have (at least) dev / test / prod workspaces + N-number of feature branch workspaces, depending on how many people work on the solution. Yes, that means a lot of workspaces. But in the end you don’t pay for the workspace, but you pay for the compute.
Hope this helps,
–Marc
LikeLike
Hi Marc,
Thanks for this article.
I am trying to implement this myself, but running into trouble!
The WH it’s trying to replicate in the new staging workspace, is using the same name so I get the error below.
Operation blocked by admin
We couldn’t complete this request because the items in the following list have a reserved name. Try again later.
TEST WH
Workload Error Code PowerBIMetadataArtifactDisplayNameInUseException
Workload Error Message The specified DisplayName is already in use in an artifact.
Any advice on this?
LikeLike
Hi Chris,
I think the error is pretty clear stating that the item “TEST WH” is already taken. Keep in mind that if you just deleted an item with the same name, on the backend the name keeps reserved for about 15 to 20 minutes I believe. But if you think all this is not true, then I recommend raising a support ticket.
–Marc
LikeLike
Hi Marc,
It’s because I’m testing out the ‘Branch out to another workspace’ option, but my workspace contains a Warehouse / Notebook / Reports etc.
The other elements seem fine when branching out and it replicates itself, it’s just the Warehouse that errors due to the same name.
I assume when you tested this, a warehouse wasn’t a part of the workspace?
Thank you,
Chris D
LikeLike
Please raise a support ticket to Microsoft if you think something is broken.
— Marc
LikeLike